
The additional layers of the hull are built in one to two pieces as I could get them from available stock.
Once you have cut the bottom hull, turn it upside down on top of another board and trace the outer edge. This will mark the cut for the bottom of the second layer. Draw another line parallel to this line 3/4" inside the first. Set your saw for a 12 degree cut, making sure the angled blade goes outwards from both lines. Check the fit against the hull.
Before you glue it in place, turn the 2nd layer upside down and trace both the inside and outside edges for the third layer.
Next, figure out how to glue everything together.
Now glue in place on the hull bottom board. If you forget to trace before you glue, you can easily trace the outside line but the inside edge is difficult.
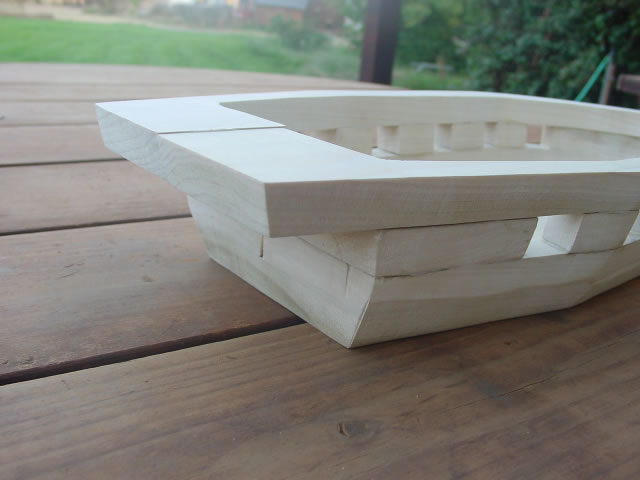
The third layer consists of two short pieces at the bow and stern, plus small blocks in between the cannon ports. The blocks are about 1 3/8" long and the gaps for the cannon ports are 1". Some of them will angle in a bit depending on the hull shape.
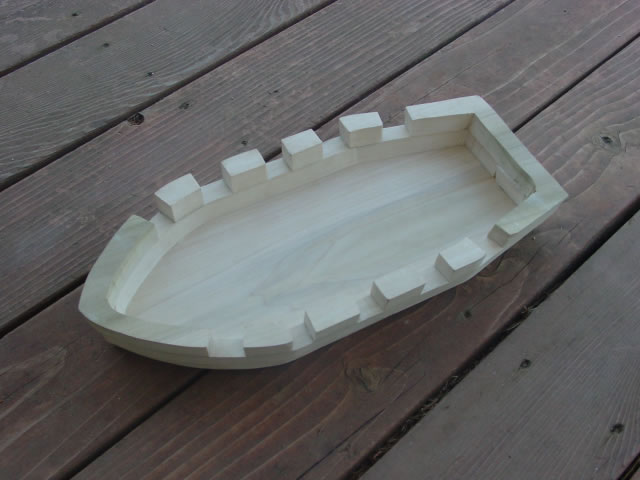
The ship with three layers before adding the cannon ports:
This shows the bottom solid board, one layer built from two pieces going around the entire boat, then two short pieces in the bow and stern. The gap along the side is for the cannon ports. Pencil marks have been made for the small blocks between the cannon ports.
I didn't get the gap between the two boards very tight in the back, so be careful as you lay out the lines and cut. If possible, use a clean board edge for places where you'll have two pieces butting together.
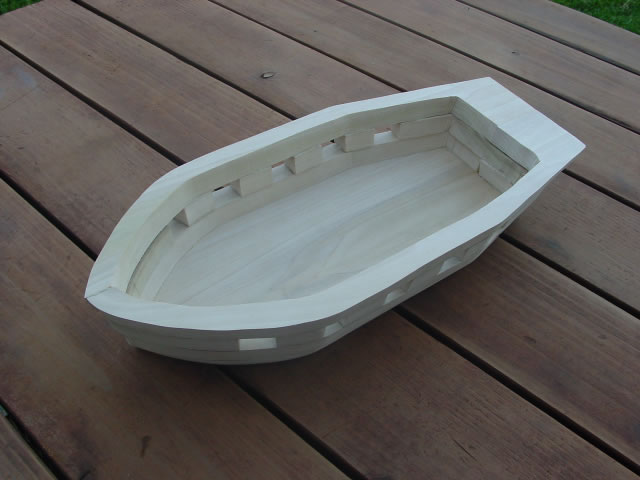
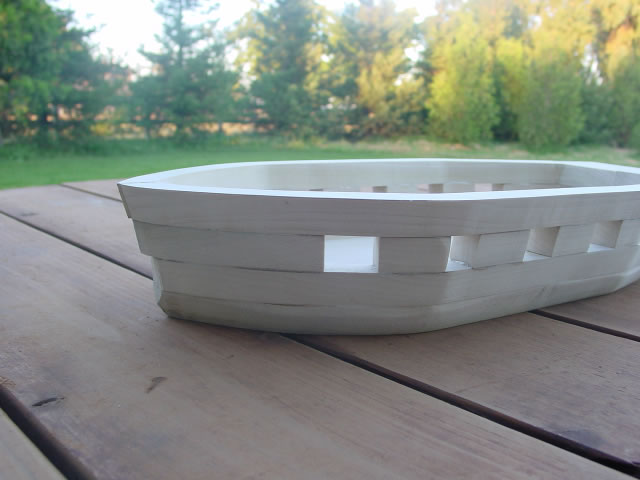
Hull with small blocks between cannons in place:
These were cut from scrap, again at the same 12 degree angle as the first two layers. Some of these are straight and easy to make, while the front and back blocks had to follow the curve of the hull.
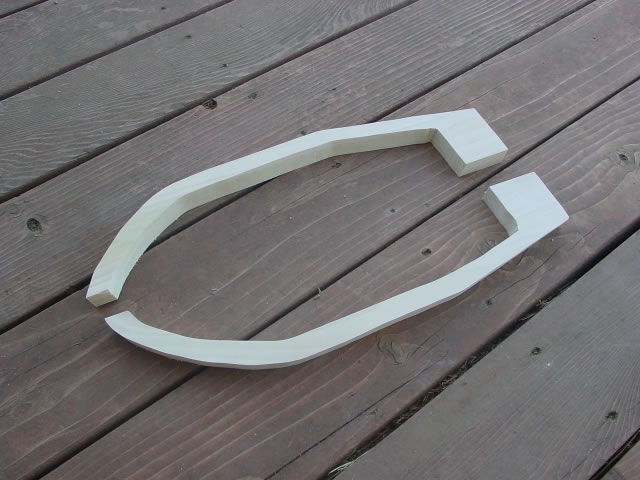
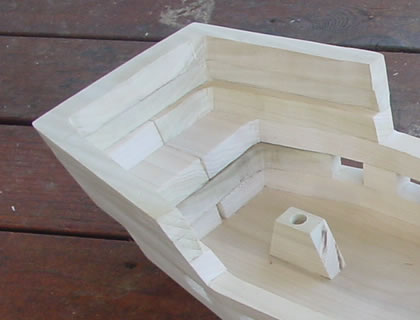
Again, turn the hull upside down and trace the edges for the next layer. This time, however, the stern will jutt out an additional 1 5/8 inches. I cut these pieces from two boards, using the clean edge at the bow and stern so they will assemble flush.
The pieces for the forth hull layer:
After gluing on the forth hull layer, it's really starting to look like a ship:
About this time I decided to add a little more curvature to the hull. I increased the cutting angle on the sabre saw and trimmed a bit of the bottom. I was more aggressive near the bow and stern, and tried to keep an even line in the middle. If you start the bottom cut with a sharper angle, you won't need to do this.
Note the somewhat wavy line on the bottom edge with the extra wood trimmed out. The hull isn't complete and hasn't been sanded smooth yet.
View of the stern:
The 5th layer consists of bow and stern pieces only. The middle is left open from this point. Use the same tracing technique to layout and cut. The ends of these (the cutout middle part) was also cut at the same angle.

The sixth layer is similar to the fifth, but is cut vertically on the inside. This leaves a small lip around the inner edge, forming a support for the rear quarterdeck and the front foredeck. Thus the sixth layer pieces are 3/4" thick at the top, but about 5/8" think on the bottom. You can also cut these first at the usual angle, then cut out the inside vertically.
Before you glue on the 6th layer (the one you just cut differently) trace the inside bottom edge of both pieces on a piece of paper and set it aside. This will be used as a template for the quarterdeck and fordeck.
The seventh layer goes around the rear quarterdeck only. The bow is six layers high, the stern seven. Cut this layer from one piece of wood, if possible, to eliminate a visible joint.
Once all the layers are assembled, sand the outside smooth and clean up the joints and curvature.